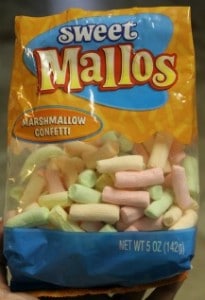
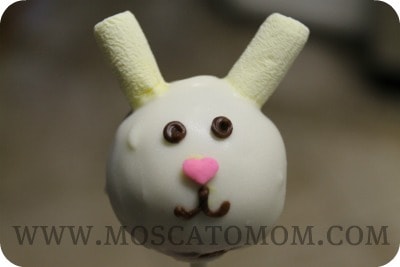
 This week I began practicing my Easter Cake Pops with my Babycakes Cake Pop Maker– making Easter Bunnies, Chicks, Sheep, and even Easter Baskets. They were all relatively easy – which surprised me – though some took many more steps than the others. My favorite – or the ones I think turned out the cutest – were the Easter Bunnies.
Easter Bunny Cake Pops
Ingredients:
- Babycakes Cake Pop Maker
- Pillsbury Cake Mix of your choice (Pillsbury works best in the Cake Pop Maker)
- White Candy Melts
- Sweet Mallows Marshmallow Confetti
- Pink Heart shaped candy sprinkles
- Chocolate Piping Icing with bag and small tip
Begin by making your cake pops as usual with the Babycakes Cake Pop Maker. Pillsbury mixes work best – my favorite being the Funfetti style. Mix your cake batter as usual by the directions on the box, and spoon a teaspoon of mix into each hole and cook for four minutes. Place cooked cake pops on a cookie sheet and run into the freezer for no less than an hour. Then “stick” your cake pops using a bit of candy melts on the tips of your sticks and run into the freezer for another hour. Now your cake pops are ready to decorate.
 I have seen pictures of these guys where the baker had used Spring Candy Corn for the ears… I looked at four different stores and was unable to find them. I was about to give up and ditch the entire idea when I saw these near the marshmallows in Walmart. I decided to give them a try, and I was pleasantly surprised with the results. I did use scissors to snip the very ends off – both to make the proper size for “ears” but also to give some added “stickiness” to help them stay on the bunnies heads.
For the Easter Bunny Cake Pops you will use the white candy melts which can be found in just about any grocery store. Almond Bark works as well but I have found it to be a bit thinner than the candy melts so it doesn’t stay smooth quite as well. Do NOT try to use cake icing – its a totally different consistency when heated. Melt the white candy melts in 30 second increments and stir – making sure you do not burn it.
Dip your Easter Bunny Cake Pop gently into the white candy melts and place in your cake pop holder. While the coating is still good and warm, stick the Marshmallow Confetti with the snipped ends into the melts in the place for ears. Hold for a few seconds until the candy begins to set and the ears and secure.
Let the candy coating set for about 20 minutes or until completely cooled and hardened. Do not put into the freezer or refrigerator as that will cause the candy coating to “sweat” – making the next steps virtually impossible. Simply let the cake pops sit room temperature.
Using your piping bad and icing, put a tiny dollop of icing onto a pink candy heart sprinkle and place your “nose” in the center of the Easter Bunny Cake Pop leaving room for both eyes above and the mouth below. I found that since I have acrylic nails that it was easier to lower the cake pop onto the sprinkle than trying to hold on to the teeny little heart and stick it on there. I think I dropped about 15 of them before figuring this out. Then pipe on eyes and a mouth to complete your Easter Bunny Cake Pop. The finished result:

These were not just the cutest, but by far the easiest as well. This one was great to let the girls help with – whether it was placing and holding the “ears” or the “nose.” They also love helping me with the Babycakes Cake Pop Maker – I put the batter in, Taylor is in charge of the timer, and Sami pops the cake pops out onto the cookie sheet when they are finished. It’s like we have our own little assembly line… and it is CLEAN!! No messy hands!


The post Easter Bunny Cake Pops appeared first on .